Sponsored Ads
If this is your first visit, be sure to check out the FAQ by clicking the link above. You may have to register before you can post: click the register link above to proceed. To start viewing messages, select the forum that you want to visit from the selection below.

<<<<<< Register to remove these ads >>>>>>


Go Back   South East Mopars Forum > Mopar Models > LX Forum
Become a Supporting Member         Become a Preferred Vendor

Reply
 
Thread Tools Search this Thread Display Modes
Old 08-09-2012, 10:54 PM   #1
 
UnderCover's Avatar
UnderCover
R/T Member
 
Join Date: Jan 2011
Location: Croton, NY
Name: Art
Age: 40
Posts: 987
Default How to: Painting HEMI Engine Covers
So after painting my 2nd LX Platform HEMI engine cover - I figured I'd do a write up on it. In theory, I guess this would work with any plastic engine cover.

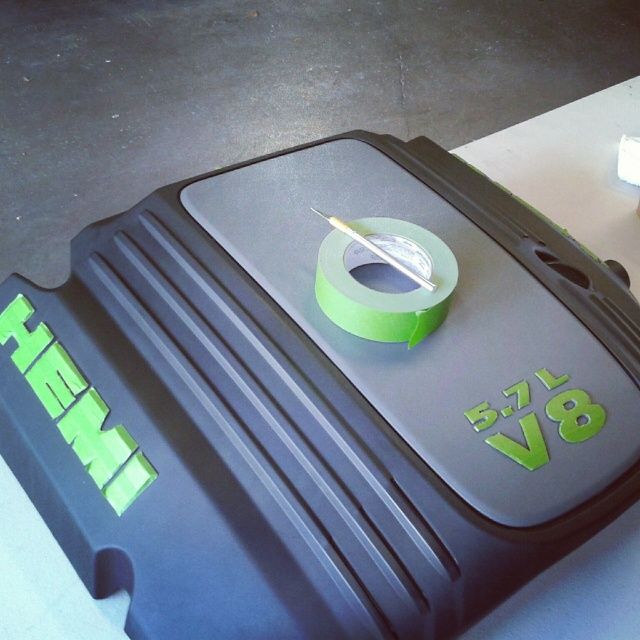
Step 1:
I masked off the "HEMI" Letters, to keep them the original brushed metal look, and the "5.7L V8" to keep it gray. (That will eventually get painted later)
The tape I used is Frog Masking Tape with PaintBlock - It worked wonders, no paint running under the tape at all. Use an X-acto knife and a good straight edge to keep the lines sharp. Score the tape well, and don't pull when remove what you're cutting away, to keep good lines.


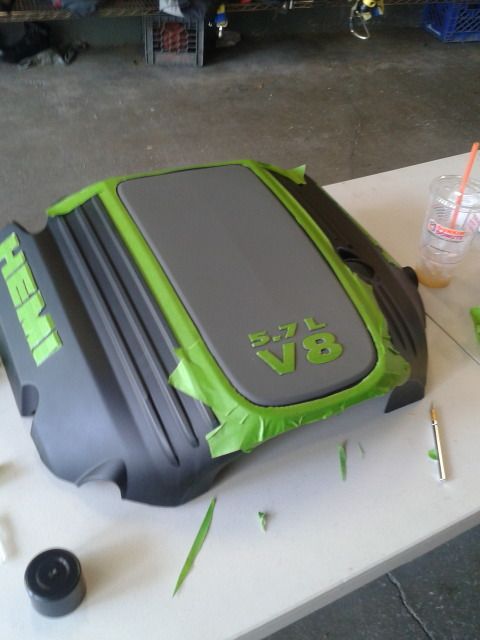
Step 2:
Run the tape around the edge of the inner plastic piece, going as close to the edge as possible, but not inside the groove that separates the 2 sections.


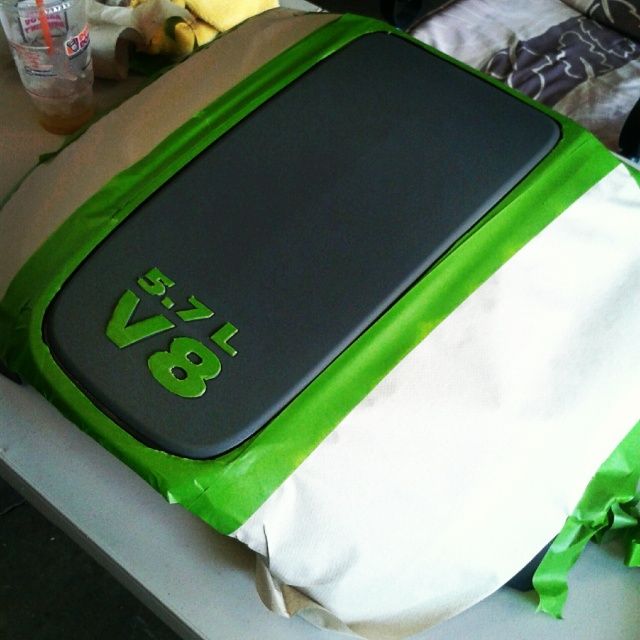
Step 3:
Using newspaper or thick paper towels, cover and tape off the rest of the cover to keep off overspray


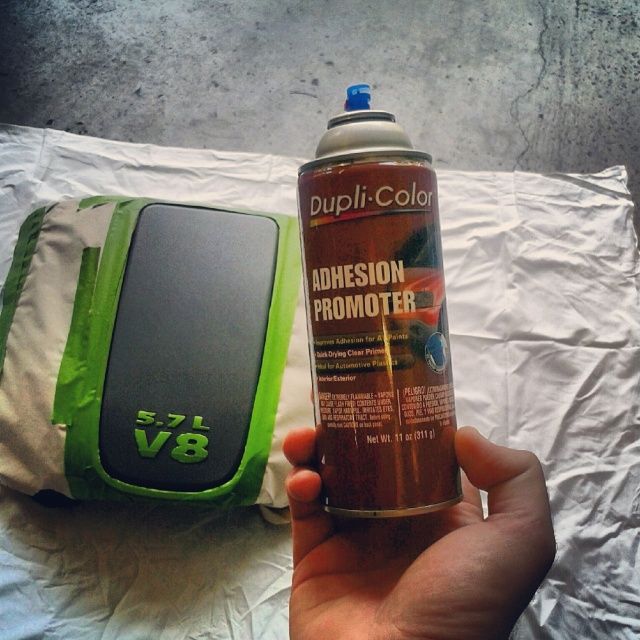
Step 4: MOST IMPORTANT STEP!
If you want the paint to stick - you need a good plastic primer. I used Duplicolor Adhesion Promoter - found in any auto parts store. 4 light coats, with only 2 to 3 minutes between coats. Then you have to apply your base coat within 10 minutes for best results.


Step 5: The fun part
Now it's time to add the color. For mine, I used duplicolor perfect match "Intense Blue Pearl" (Chysler Color) as it was the closest I could find to the blue stripe on the Mopar 11. I did 3 light coats, followed by a medium coat to avoid runs. Use as many coats as needed to get the coverage/darkness you are looking for. Wait about 10 minutes in between coats.
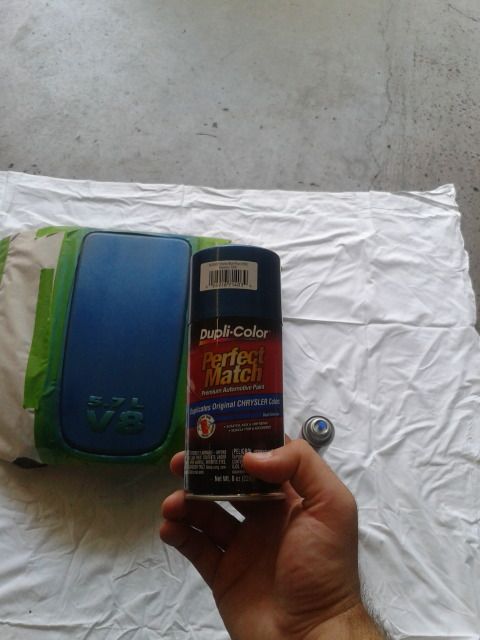


Step 6:
After allowing appx 4 hrs for the color to dry, remove the masking, and then mask off the freshly painted area. This is where you'll want to tape off the grooved area between the 2 sections. Lay the tape just over the edge, and then work it in the edge with a dull tipped tool. I used a plastic knife. And paint as you did the other section. For this color, I just used a gloss black engine enamel. I have seen some people use Hemi orange, which looks awesome, but I chose not to because other than the fact that it's Gators colors, I don't like the scheme. (In NY, everyone thinks mets! Lol)


Step 7:
After a few hours of drying time, remove your masking. For the ribs/flutes on the cover, 1/4" vinyl pinstriping works perfect for adding some additional color. Pull snugly on the striping when laying it down to avoid bubbles in the surface. When cutting it, cut at the angle that the ribs end for a really nice finish.

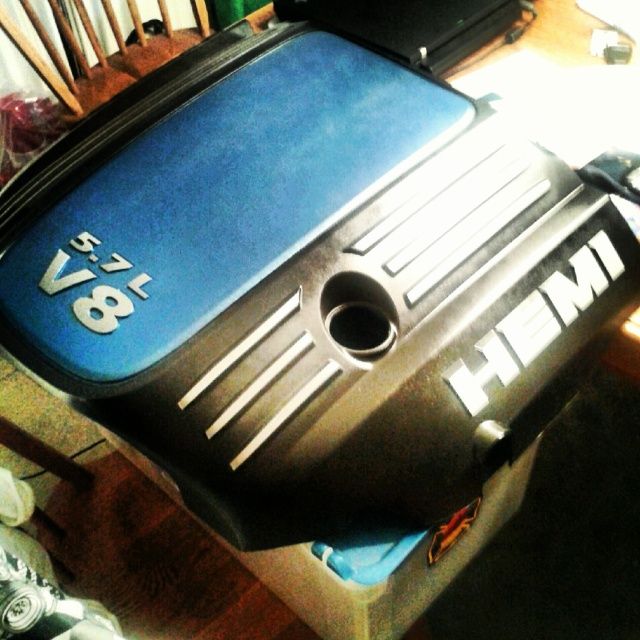
Once you get those laid down, now it's time to clearcoat. I used duplicolor clear acrylic enamel, sprayed in 2 coats. 3 VERY light coats, and 2 medium coats gave a nice glossy finish. ALLOW 24 HOURS FOR THE CLEAR TO DRY!! It will be tempting to put it back on the car, but play it safe. Here's the end result!


__________________


UnderCover is offline   Reply With Quote
Old 08-09-2012, 11:19 PM   #2
SmokedRam
Super Moderator
 
Join Date: Oct 2010
Age: 45
Posts: 6,570
Garage
Send a message via Yahoo to SmokedRam
Default
Awesome write up, Art!
SmokedRam is offline   Reply With Quote
Old 08-10-2012, 12:16 AM   #3
 
NOTPAID4's Avatar
NOTPAID4
N.C. Chapter President
 
Join Date: Nov 2010
Location: Salisbury, North Carolina
Name: Jim
Age: 77
Posts: 2,683
Garage
Default
I agree and a great job too!


__________________
President NC Chapter


NOTPAID4 is offline   Reply With Quote
Old 08-10-2012, 05:40 AM   #4
 
LB3711's Avatar
LB3711
Turbo Member
 
Join Date: May 2011
Location: Trumbull, CT
Name: Matt
Age: 50
Posts: 1,296
Send a message via AIM to LB3711 Send a message via MSN to LB3711 Send a message via Yahoo to LB3711
Default
looks good

Sent from my Transformer TF101 using Tapatalk 2


__________________


2011 Dodge Ram 1500 QC Hemi Big Horn 4x4 -- Has Mods
LB3711 is offline   Reply With Quote
Old 08-10-2012, 06:49 PM   #5
 
3rd Strike's Avatar
3rd Strike
Newb
 
Join Date: Jan 2011
Location: Sikeston, MO
Name: Duane
Age: 60
Posts: 28
Default
Nice job! Definitely need that Adhesion Promoter....here's a pic of ours...
Attached Images
File Type: jpg 385897.jpg (67.2 KB, 3 views)


__________________

Owner of 3rd Strike Performance and Crazy Horse Productions

POW-MIA Charger

Retired U.S. Army Veteran - Huah!
3rd Strike is offline   Reply With Quote
Reply

Bookmarks


Posting Rules
You may not post new threads
You may not post replies
You may not post attachments
You may not edit your posts

BB code is On
Smilies are On
[IMG] code is On
HTML code is Off

Forum Jump

Similar Threads
Thread Thread Starter Forum Replies Last Post
Painting Calipers AWE Daniel Interior & Exterior 27 08-12-2011 06:47 PM
DIY engine cover painting Vultite DIY Articles 14 06-27-2011 05:48 PM
FEELER: Half covers RACERAM9 General Discussions 9 04-12-2011 09:12 PM
Need some painting tips - K&N Intake UnderCover The Lounge 11 03-05-2011 10:58 AM
Debadging or Painting.. BassMaster Interior & Exterior 19 02-03-2011 08:06 PM