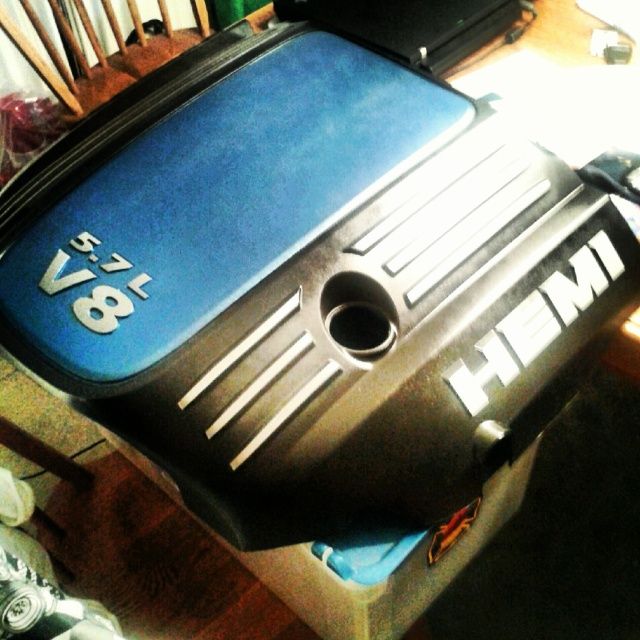
So after painting my 2nd LX Platform HEMI engine cover - I figured I'd do a write up on it. In theory, I guess this would work with any plastic engine cover.
Step 1:
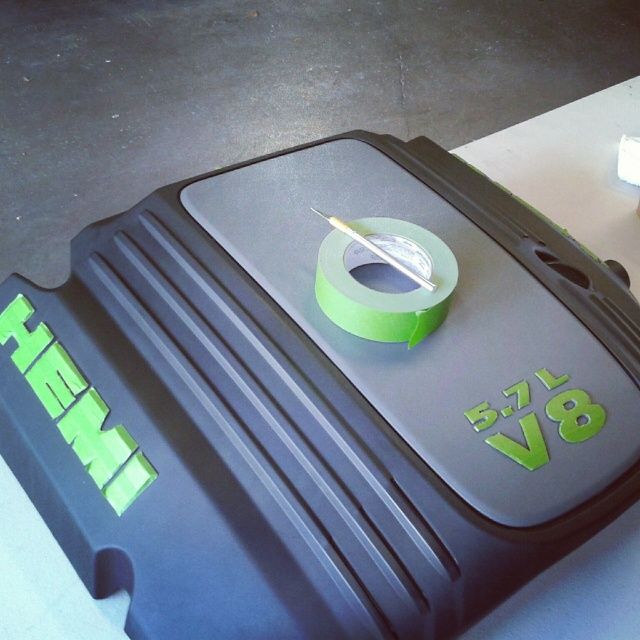
I masked off the "HEMI" Letters, to keep them the original brushed metal look, and the "5.7L V8" to keep it gray. (That will eventually get painted later)
The tape I used is Frog Masking Tape with PaintBlock - It worked wonders, no paint running under the tape at all. Use an X-acto knife and a good straight edge to keep the lines sharp. Score the tape well, and don't pull when remove what you're cutting away, to keep good lines.
Step 2:
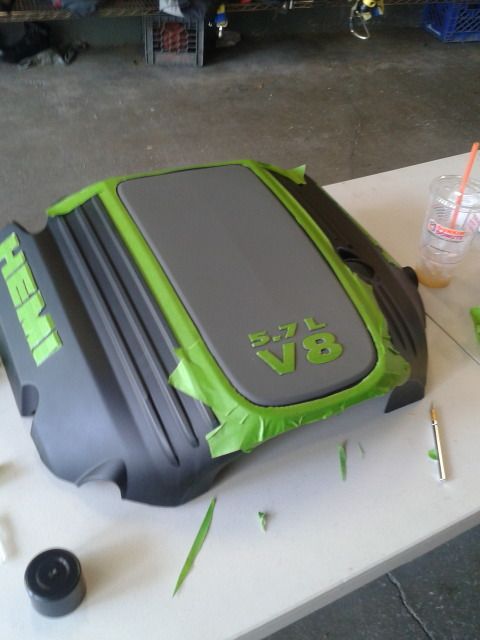
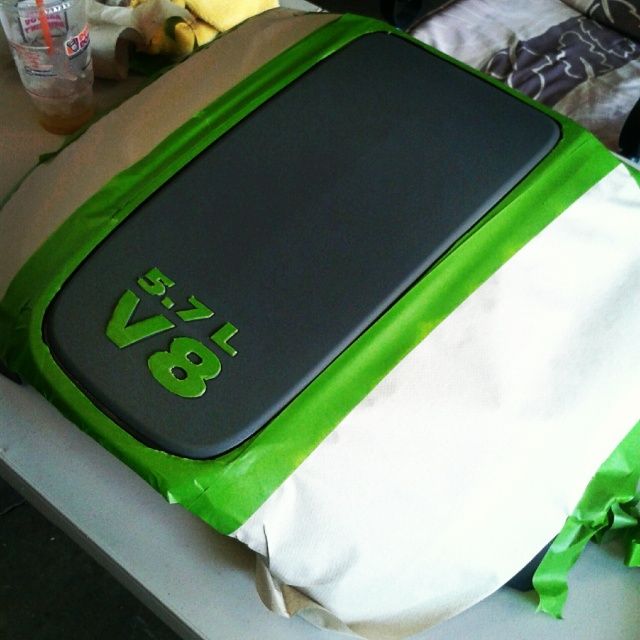
Run the tape around the edge of the inner plastic piece, going as close to the edge as possible, but not inside the groove that separates the 2 sections.
Step 3:
Using newspaper or thick paper towels, cover and tape off the rest of the cover to keep off overspray
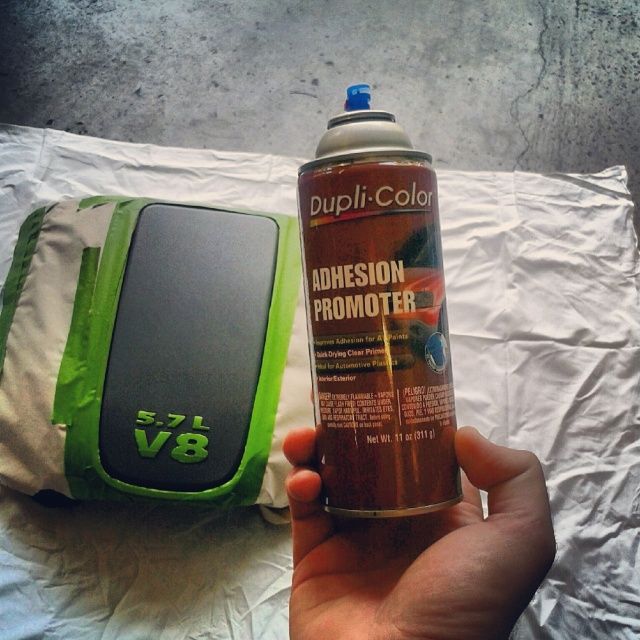
Step 4: MOST IMPORTANT STEP!
If you want the paint to stick - you need a good plastic primer. I used Duplicolor Adhesion Promoter - found in any auto parts store. 4 light coats, with only 2 to 3 minutes between coats. Then you have to apply your base coat within 10 minutes for best results.
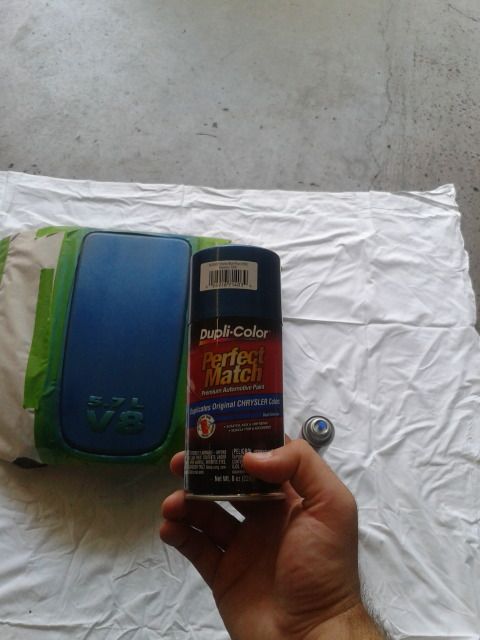
Step 5: The fun part
Now it's time to add the color. For mine, I used duplicolor perfect match "Intense Blue Pearl" (Chysler Color) as it was the closest I could find to the blue stripe on the Mopar 11. I did 3 light coats, followed by a medium coat to avoid runs. Use as many coats as needed to get the coverage/darkness you are looking for. Wait about 10 minutes in between coats.
Step 6:
After allowing appx 4 hrs for the color to dry, remove the masking, and then mask off the freshly painted area. This is where you'll want to tape off the grooved area between the 2 sections. Lay the tape just over the edge, and then work it in the edge with a dull tipped tool. I used a plastic knife. And paint as you did the other section. For this color, I just used a gloss black engine enamel. I have seen some people use Hemi orange, which looks awesome, but I chose not to because other than the fact that it's Gators colors, I don't like the scheme. (In NY, everyone thinks mets! Lol)

Step 7:
After a few hours of drying time, remove your masking. For the ribs/flutes on the cover, 1/4" vinyl pinstriping works perfect for adding some additional color. Pull snugly on the striping when laying it down to avoid bubbles in the surface. When cutting it, cut at the angle that the ribs end for a really nice finish.
Once you get those laid down, now it's time to clearcoat. I used duplicolor clear acrylic enamel, sprayed in 2 coats. 3 VERY light coats, and 2 medium coats gave a nice glossy finish. ALLOW 24 HOURS FOR THE CLEAR TO DRY!! It will be tempting to put it back on the car, but play it safe. Here's the end result!